Tribute to DOOM
Solo Student Encounter Design Project at DigiPen Institute of Technology
Roles: Encounter Designer, Level Designer.
Tools: DOOM (2016) SnapMap Level Editor.
Skills: Encounter Design, Level Design, Design Iteration, Playtesting.
Genre: First-Person Shooter, Action, Combat.
Target Audience: DOOM (2016) Players and Players searching for fast-paced, power fantasy emulating combat with some Metroidvania progression elements.
SnapMap Level Code: URBQYAYK
Combat Encounters
Tribute to DOOM is a level design study focusing on compelling Encounter Design and Metroidvania Level Design progression. Combat Encounters can serve a great deal of purpose in games, and they can just as much be a tool for exemplifying the gameplay systems as they can be a powerful tool for ludonarrative integration, and tuning the emotional valence of the player. See below how I studied DOOM's combat design to build encounters that not only feel authentically DOOM, but also steer the player's emotions and confidence throughout the map.

Encounter Design
Progressive Challenges which prompt DOOM's Push Forward Combat

Push Forward Combat
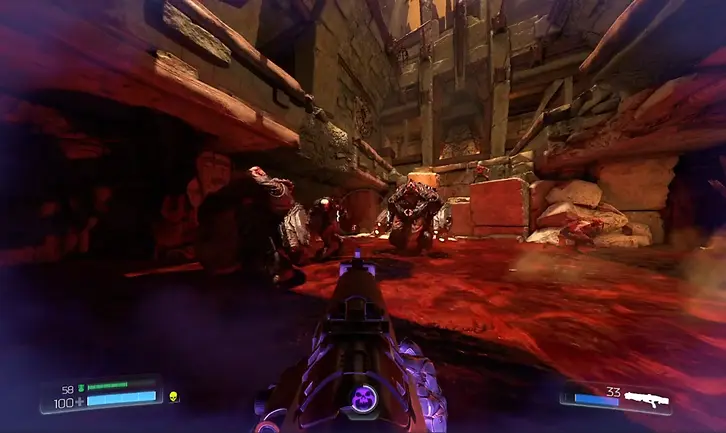
DOOM (2016) is an iconic title for many reasons, but one certainly would be its approach to combat design. In trying to replicate the feel of DOOM's combats, I designed my encounters to encourage the player to play aggressively, never take cover, and never stand still.
My process designing these moments, began with a combination of replaying DOOM (2016) in it's entirety, as well as reading up on developer interviews to study from the games team exactly what elements make DOOM's combat uniquely DOOM.
Below, you can see the Encounters I designed, with a brief breakdown of decisions I made and why I made them.
Encounter Gallary
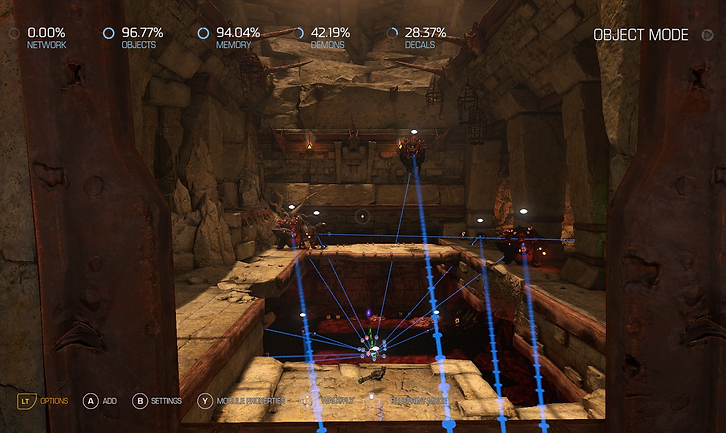
Encounter 1
This first encounter comes in three parts. I wanted to slowly introduce more types of enemies to the player as the level played out and to match the hellish aesthetic of the environment I was working in, I also made sure to use a variety of enemies that felt representative of the setting, this was maintaining a sense of narrative consistency in the encounter design.
In the first part of the encounter, a few Imps draw the player's attention to the right as they enter the room. I used these enemies here because they are easy for the player to incapacitate, but their movement patterns and projectile attacks force the player to keep moving, which hits at one of the combat pillars I mentioned previously.
Beyond getting the player to start playing in the style I mean for them too, the other purpose of this part of the encounter is to slowly draw the player back down a tunnel in the space, which leads directly into the next part of the encounter. This was done by manipulating the enemy pathing and spawn position for one of the Imps to guide the player back down the tunnel in order to have a clear shot at taking them out, and as a result, it blends the first and second parts to the encounter together seamlessly.
Around the corner, as the player takes out the last Imp from the first part of the encounter, two more Imps are spawned in, and a Mancubus in spawned in just behind them.
This evolves on the way encounters were working up this point by introducing a new type of enemy with unique behavior and much tankier health pool. An enemy like this might seem daunting at first, but the Imps in this encounter are used to ease that fear, by drawing the player in with something more comfortable and familiar.
The Imps are likely to be taken out first as well, which leave all the room in the space open for just the player and the Mancubus, which allows for the player to then use their confidence built up from dispaching the other enemies, to focus their fire on taking down the new enemy, and they are then rewarded with a small pool of health items and ammo, before the level design leads them up the stair to their left.
Up the stairs, the final part of the encounter begins. This encounter uses what what has been introduced up to this point to prompt the player to navigate a much larger combat arena, while doing battle with several Imps and now two Mancubus's, with defeating this first wave then also introducing a Cacodemon as a final enemy.
This fight is built to cap off this first room by challenging the player to navigate everything at once, but now given a bigger space, they can and will need to focus more on movement to dodge enemy attacks while still focusing on playing aggressively to negate the enemy pressure with the limited pull of ammo provided to them.
The Cacodemon here plays on the same idea of an isolated introduction to a new enemy type, but it's also an easier enemy to fight than the Mancubus's. So the purpose it ends up serving is to make the player feel powerful because they were able to take out a new challenge as if it weren't that much trouble at all, which creates a feeling of engaged confidence in the player, which they can carry with them into the next room.

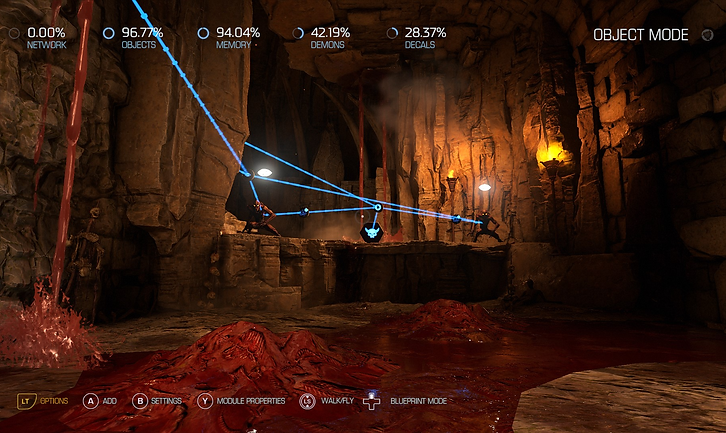
Encounter 2
Encounter two plays out in two phases. The first phase is a short ambush encounter, designed to catch the player off guard, and also to introduce them to another new enemy type, the Hell Knight.
The Hell Knight ambush provides time and space for the player to learn the new enemy type, as well as the new environmnet they are now fighting in. The movement pathing for the Hell Knight is used to guide the player down a certain path through the room, which ultimately will lead them towards obtaining a key, and triggering the second phase of the encounter.
The other idea behind this part of the fight though, is to try and rattle the players confidence a little bit. Hell Knights are comparitively more aggressive and harder to predict than the Mancubus or Cacodemon are, so introducing them here and in this way serves as a warning to the player, it's be confident and aggresive, but don't got cocky, you still have to play smart even though you might be the most power peice on the board.
Phase 2 begins when the player picks up the Yellow Skull Key in the front of the room.
This encounter doesn't add anything particularly new in the vein of enemies beyond the combination of all the thus far introduced enemy types together, but it is the first encounter designed with the expectation that the player will be using the Chaingun in addition to the Shotgun. It is also the first encounter where Power-Ups can be found in the arena, in this case being Quad Damage.
These additions to the combat loop help me balance out the player's power level against the increasingly cumbersome difficulty of the enemy combinations going up against the player. A skilled player may never need to rely on either the Chaingun or the Quad Damage, but to encourage the push-forward combat playstyle, it's important to maintain the power fantasy feeling in the player, and so these options grant all players choices in how they keep the upper hand against the increasing strength of enemies.
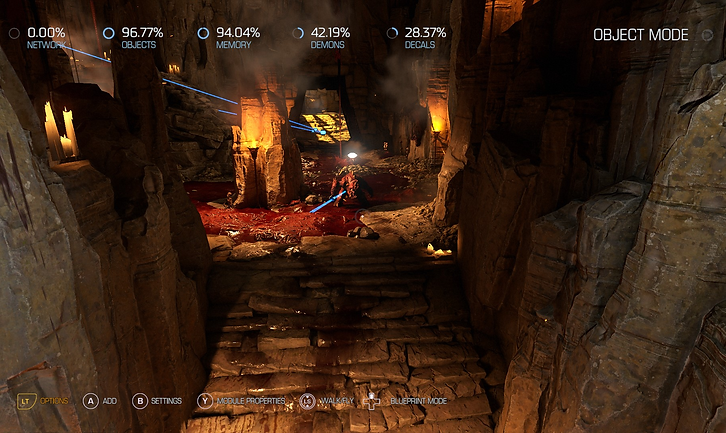
Encounter 3
Encounter three plays out in three phases, with those phases breaking up in a combination of the encounter styles used in the previous two encounters.
Similar to the first encounter, phase one begins with a few Imps drawing the player's attention to the right and up a set of stairs just as they enter the room.
Much the same as that first encounter, these Imps are used primarily for guidance rather than challenge, as they lore the player directly into the second phase of the encounter.
Taking a que from the way the Hell Knight was introduced in the second encounter, phase two begins with a Pinky rushing at the player from the top of the stairs just as the player turns the corner.
The pinky is introduced here in isolation particularly so that the player can get used to how to defeat them, since DOOM (2016)'s redesigned take on the PInky now asks the player to consider position and perspective so that they can damage the Pinky from their tail weak spot.
Also similar to the Hell Knight introduction, the movement pattern and positioning of the Pinky serves a guiding purpose in the level design to draw the player up the stairs to where they will find the Blue Skull Key, which in picking up will trigger the third phase of the enocunter.
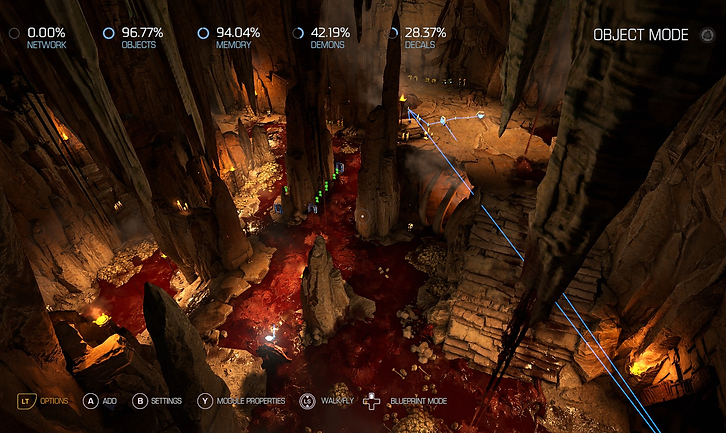
The last part of the encounter sees multiple Pinkys mixed in with the previously introduced enemy types.
The real challenge of this phase is the arena the player is fighting in. Pathways here are a lot narrower, and besides the platform at the top of the room, optics are also fairly compromised, which makes the Pinky's charging attacks all the more interesting and dangerous, since space to avoid them is limited.
There are fewer enemies in this encounter than in the other encounters in the game, but that's done to encourage the player to focus on the environment. This fight is all about paying attention to what you can see and thinking quickly with that information, a design direction heavily inspired by the kinds of maps and encounters seen in DOOM (1993) and DOOM II.
Encounter 4
Encounter four is the final encounter in the level, and instead of using distinct phases, it instead relies on a much more traditional wave system.
The first wave begins with an ambush from the player's right, as the player is attacked by the final enemy type I use in the level, the Revenant. The Revenant is the most difficult type of enemy featured in the map, and this one-on-one battle gives the player a brief moment to find their footing against them before the other enemies join in the fight.
Were I to iterate further on the encounter design, I would want to reframe how I introduce the Revenant to add greater interest to the space. I think there's great opportunity to use the Revenant to guide the player's eyes to the floating platforms in the arena, each of which has exploding barrels on them, which the player can use as a tool for facing the encounter. This change would both create visual interest and add drama to the Revenant introduction, while also tutorializing a means of battling them that the player may not have considered, which would then flow nicely into the rest of the encounter, where the player can continue to use this idea against the other enemies in the subsequent waves.
Defeating the Revenant spawns in the second wave, which is also followed by a third wave. These subsequent waves bring in small groups of enemies featured in the previous encounters, and a couple more Revenants spaced in as well.
Defeating them all unlocks the exit to the room, leading directly to the end of the level.
Level Design
Recreating Classic DOOM's Metroidvania Style Lock and Key Progression

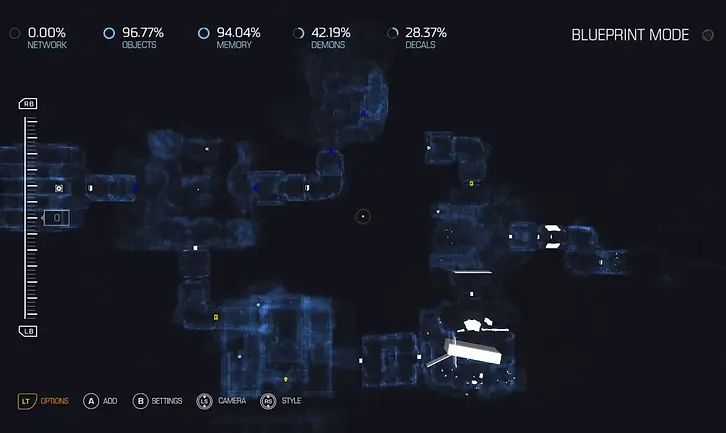
Metroidvania Map Design
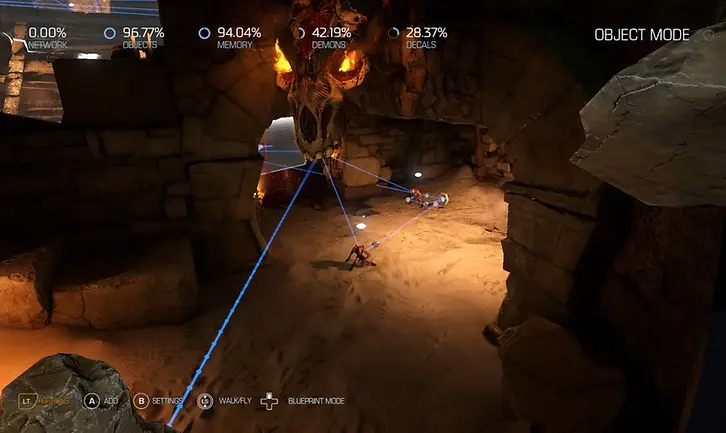
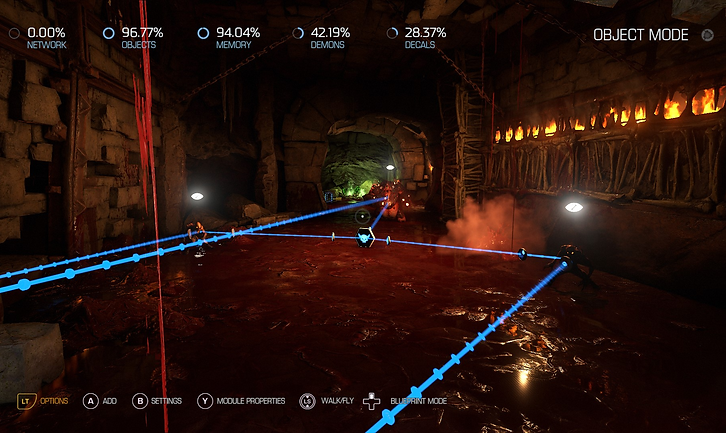
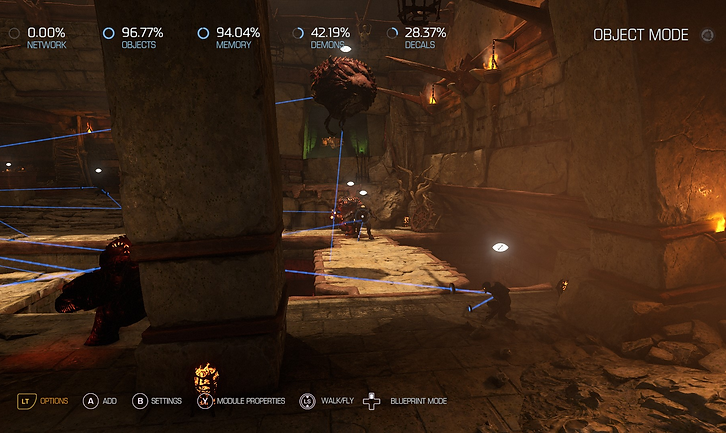
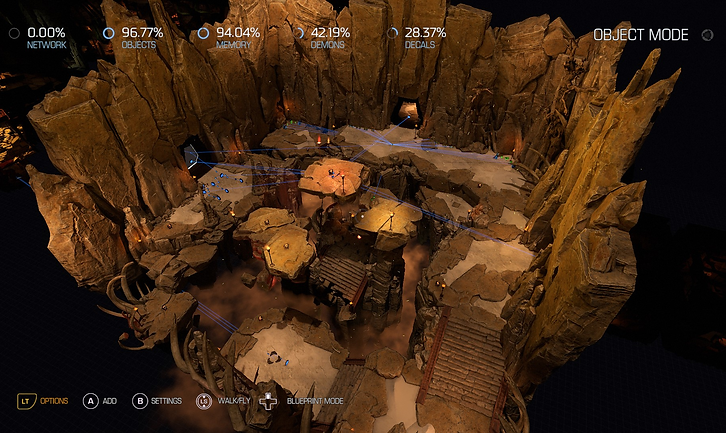
One of the limitations of DOOM (2016)'s Snapmap editor is that it isn't built for designing the actual rooms, those are all prebuilt assets. Instead, SnapMap is built for putting the rooms together in unique ways, and building encounters and other types of scenarios within them.
There is some leeway in this however, since the editor does provide you with assets that can be used to block off pathways, and create smaller spaces within the larger prebuilt spaces, which is something I took ample advantage of at several points throughout the map. However, what this restriction let me focus on instead, was how the world at large fit together, and the ways locks and keys can be used to make the space bigger over time.
One of the design lessons I've learned in studying a Metroidvania philosophy to level design is that it can be more advantageous to focus on the larger map and how the rooms will fit with each other before concerning about what goes in each room. DOOM's historic Lock and Key progression systems invite this kind of approach to level design, and in my pursuit to create a style of map that pays homage to DOOM (1993) and DOOM II's design direction, creating that type of fantasy in the gameplay was crucial.
My process for developing this began by illustrating a Level Design Document, which you can see to the right. While out the other side of crafting the level, this document is wildly outdated, it served as a starting point, which I was able to take into the editor.
The next thing I did was lay out the rooms that I wanted to use for encounters and then make connecting paths between them. I populated those rooms with the weapons I was going to use, set up the encounters, and broke up the individual spaces to create the small space structure within the large rooms. This let me get away with the multi-part encounter structure I did because depending on how you look at it, I was breaking up the spaces to fit 2 or 3 encounters in each room, rather than one large encounter per room.
I purposely designed the map originally in a circle shape, so that it could loop back on itself, but since the player would have access to new keys by that point in the level, they would be able to unlock a new path forward that was previously locked before. After some iteration, while this intended result is achieved, the map itself never actually circles on itself (though given the layout, you can still where it would have pretty easily), and this is for two reasons:
-
Memory was pretty restricting, and I needed to free up the memory budget to provide space for encounters.
-
The looping space is cool if there's interesting content to fill it, but if it only exists to make the connection, then there's a lot of empty space to move through, which isn't very engaging.
Given this, I made use of a different component from the classic DOOM titles to bridge gaps, Teleporters. Teleporters also provided me the space to show the player parts of the level they would need to come back to much later, and instantly plop them back in an earlier space where they could make use of the new keys they were acquiring. In returning to the spaces they reached previously, now with new keys, and weapons, different events could take place in the same rooms, which added depth to the level design and created interest in the expanding world thanks to subtle level forshadowing.
Playtesting and Iteration
Fine Tuning Encounters and Resources to Perfect the Power Fantasy

Balancing the Combat
One of the challenges behind Encounter Design is figuring out how to tune the combat to get the right balance of challenge for players, while not demanding too much of them to create a level of frustration that might turn them away from the experience. In playtesting Tribute to DOOM, this factor was the main area of concern, and I addressed it in a few different ways.
The Level Design around a combat equips the player the with the resources they need to stay in the fight. In altering the proportions of ammo, health, armor, and Power-Ups in the space, I was able to either actually change the numbers enough to give the player an edge, or inflate the confidence of the player enough to help them take an emotional edge into the battle.
Another thing I changed was the actual weapon lineup available to the player, and in classic DOOM fashion, I created multiple opportunities for the player to obtain different weapons, creating a safety net if the player avoided exploration, but also rewarding their exploration at other times, giving them new toys to assist in their demon slaying endeavors.
Of course, altering enemy positions, spawn rates, or even excluding some enemies also played a role in the game balancing, and served as a great backup option if the above ideas weren't able to resolve a certain encounters balancing, which in the application of the final encounter, certainly became the case.